|
KA114 at The Fighter Factory
|
|
|
Hamilton Airshow, Ontario, June 2013
|
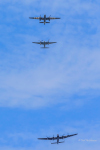 |
B-25, Mosquito and Lancaster flying in formation.. Image courtesy of Neil Hutchinson. For a larger (1111x1667, 288kb) image, click
here. |
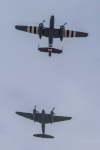 |
B-25 and Mosquito flying in formation. Image courtesy of Neil Hutchinson. For a larger (800x1200, 232kb) image, click
here. |
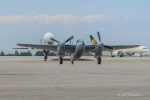 |
KA114 taxies in following a flight. Image courtesy of Neil Hutchinson. For a larger (1200x800, 447kb) image, click
here. |
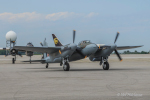 |
KA114 taxies in following a flight followed by the B-25. Image courtesy of Neil Hutchinson. For a larger (1200x800, 441kb) image, click
here. |
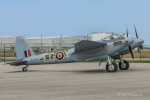 |
KA114 taxying, view from the starboard side. Image courtesy of Neil Hutchinson. For a larger (1200x800, 494kb) image, click
here. |
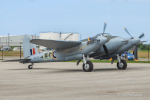 |
KA114 turns to starboard. Image courtesy of Neil Hutchinson. For a larger (1200x800, 540kb) image, click
here. |
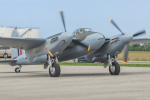 |
Closer view of KA114 turning in preparation for engine shut down. Image courtesy of Neil Hutchinson. For a larger (1200x800, 496kb) image, click
here. |
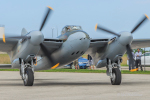 |
Closer view of KA114 turning in preparation for engine shut down. Image courtesy of Neil Hutchinson. For a larger (1200x800, 515kb) image, click
here. |
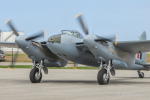 |
KA114 stopped with engines still running. Image courtesy of Neil Hutchinson. For a larger (1200x800, 485kb) image, click
here. |
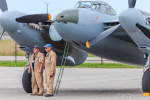 |
Pilot, Mike Spalding (R) and navigator post-flight. Image courtesy of Neil Hutchinson. For a larger (1200x800, 653kb) image, click
here. |
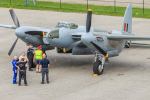 |
Chocked with cannon and bomb doors open. Image courtesy of Neil Hutchinson. For a larger (1200x800, 857kb) image, click
here. |
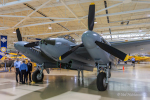 |
Overall view of KA114 inside the hangar from the front-port quarter. Image courtesy of Neil Hutchinson. For a larger (1200x800, 447kb) image, click
here. |
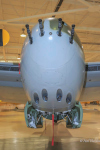 |
Close up of KA114's nose, machine guns and cannon from directly in front of the aircraft. Image courtesy of Neil Hutchinson. For a larger (800x1200, 108kb) image, click
here. |
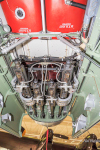 |
View looking forwards showing the four 20mm cannon from underneath the bomb bay. Image courtesy of Neil Hutchinson. For a larger (800x1200, 251kb) image, click
here. |
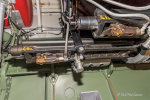 |
Close-up of the port-most cannon and rear mounting arm. Image courtesy of Neil Hutchinson. For a larger (1200x800, 712kb) image, click
here. |
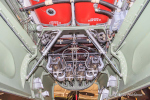 |
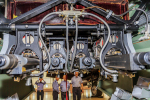
Overall view looking forwards showing the four 20mm cannon from underneath the bomb bay. Image courtesy of Neil Hutchinson. For a larger (1200x800, 247kb) image, click
here. |
 |
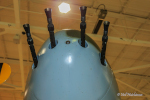
View looking directly forwards of the rear of the four cannon. Image courtesy of Neil Hutchinson. For a larger (1200x800, 967kb) image, click
here. |
 |
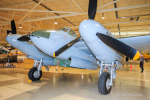
Close-up of the nose and four machine guns. Image courtesy of Neil Hutchinson. For a larger (1200x800, 376kb) image, click
here. |
 |
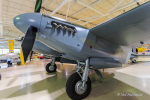
Overall view of KA114 in the hangar from the front-port quarter. Image courtesy of Neil Hutchinson. For a larger (1200x800, 181kb) image, click
here. |
 |
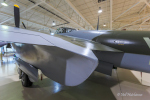
The outboard side of the port engine and nacelle. Note colour change from the exhaust on the side of the panels. Image courtesy of Neil Hutchinson. For a larger (1200x800, 653kb) image, click
here. |
 |
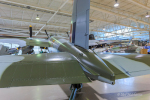
Looking towards the canopy and port nacelle from behind the outboard port wing. Image courtesy of Neil Hutchinson. For a larger (1200x800, 513kb) image, click
here. |
 |
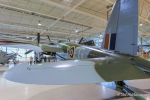
KA114's tailcone, tailplane and fin from behind the aircraft. Image courtesy of Neil Hutchinson. For a larger (1200x800, 635kb) image, click
here. |
 |
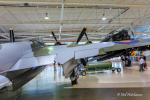
Overall view of KA114 from the rear-port quarter. Image courtesy of Neil Hutchinson. For a larger (1200x800, 679kb) image, click
here. |
 |
View from the rear-starboard quarter showing the starboard wing and nacelle. Image courtesy of Neil Hutchinson. For a larger (1200x800, 671kb) image, click
here. |
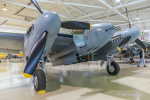 |
Overall view of KA114 from the front-starboard quarter. Image courtesy of Neil Hutchinson. For a larger (1200x800, 696kb) image, click
here. |
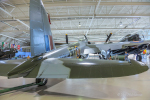 |
Overall view of KA114 from the rear-starboard quarter. Image courtesy of Neil Hutchinson. For a larger (1200x800, 765kb) image, click
here. |
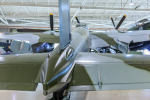 |
Another view of the tailcone, tailplane and fin from behind the aircraft. Image courtesy of Neil Hutchinson. For a larger (1200x800, 617kb) image, click
here. |
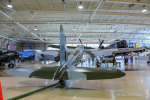 |
Overall view of KA114 from the rear. Image courtesy of Neil Hutchinson. For a larger (1200x800, 838kb) image, click
here. |
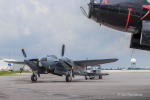 |
KA114 on the apron with the Canadian Warplane Heritage Museum's lancaster's nose at the top-right of the image. Image courtesy of Neil Hutchinson. For a larger (1200x800, 500kb)
image, click here. |
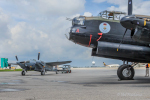 |
Wider view of KA114 on the apron with the Canadian Warplane Heritage Museum's lancaster. Image courtesy of Neil Hutchinson. For a larger (1200x800, 602kb) image, click
here. |
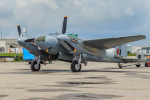 |
Overall view of KA114 from the front-port quarter. Image courtesy of Neil Hutchinson. For a larger (1200x800, 665kb) image, click
here. |
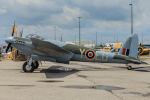 |
KA114 from the port side. Image courtesy of Neil Hutchinson. For a larger (1200x800, 656kb) image, click
here. |
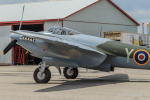 |
KA114's forward fuselage and port wing from the port side. Image courtesy of Neil Hutchinson. For a larger (1200x800, 653kb) image, click
here. |
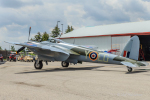 |
Overall view of KA114 from the rear-port quarter. Image courtesy of Neil Hutchinson. For a larger (1200x800, 689kb) image, click
here. |
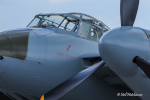 |
Close up of the cockpit canopy from the front-port quarter. Image courtesy of Neil Hutchinson. For a larger (1200x800, 371kb) image, click here. |
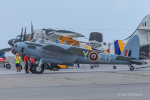 |
Overall view of KA114 on the apron from the port side. Image courtesy of Neil Hutchinson. For a larger (1200x800, 505kb) image, click
here. |
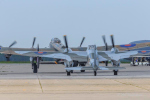 |
KA114 taxying out after the Lancaster for another flight. Image courtesy of Neil Hutchinson. For a larger (1200x800, 110kb) image, click
here. |
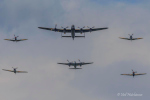 |
KA114 in formation with the Lancaster, two Spitfires and two hurricanes. Image courtesy of Neil Hutchinson. For a larger (1200x800, 45kb) image, click
here. |
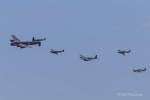 |
KA114 in formation with the Lancaster, two Spitfires and two hurricanes. Image courtesy of Neil Hutchinson. For a larger (1200x800, 45kb) image, click
here. |
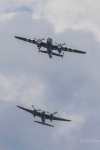 |
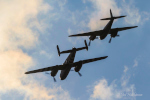
KA114 flying with the B-25. Image courtesy of Neil Hutchinson. For a larger (800x1200, 49kb) image, click
here. |
 |
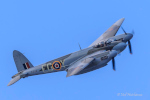
KA114 in formation with the B-25. Image courtesy of Neil Hutchinson. For a larger (1200x800, 71kb) image, click
here. |
 |
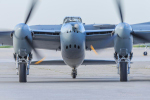
KA114 in flight. Image courtesy of Neil Hutchinson. For a larger (1200x800, 67kb) image, click
here. |
 |
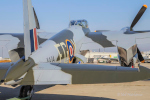
Close-up of KA114 taxying, view from directly in front of the aircraft. Image courtesy of Neil Hutchinson. For a larger (1200x800, 285kb) image, click
here. |
 |
KA114 from the rear-starboard quarter. Image courtesy of Neil Hutchinson. For a larger (1200x800, 127kb) image, click
here. |
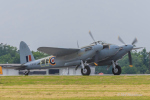 |
KA114 taxying in preparation for the next take-off. Image courtesy of Neil Hutchinson. For a larger (1200x800, 110kb) image, click
here. |
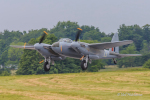 |
KA114 taking off. Image courtesy of Neil Hutchinson. For a larger (1200x800, 520kb) image, click
here. |
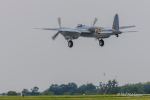 |
The undercarriage being retracted following take-off. Image courtesy of Neil Hutchinson. For a larger (1200x800, 69kb) image, click
here. |
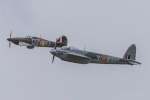 |
Mosquito and Hurricane in formation. Image courtesy of Neil Hutchinson. For a larger (1200x800, 64kb) image, click
here. |
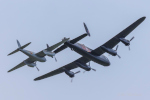 |
Mosquito and Lancaster in formation. Image courtesy of Neil Hutchinson. For a larger (1200x800, 73kb) image, click
here. |
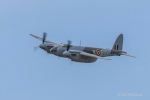 |
KA114 in flight. Image courtesy of Neil Hutchinson. For a larger (1200x800, 41kb) image, click
here. |
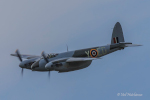 |
KA114 in flight. Image courtesy of Neil Hutchinson. For a larger (1200x800, 190kb) image, click
here. |
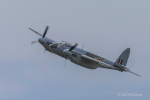 |
KA114 in flight. Image courtesy of Neil Hutchinson. For a larger (1200x800, 180kb) image, click
here. |
 |
KA114 landing. Image courtesy of Neil Hutchinson. For a larger (1200x800, 187kb) image, click
here. |
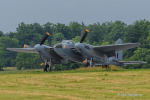 |
Roll-out after landing. Image courtesy of Neil Hutchinson. For a larger (1200x800, 590kb) image, click
here. |
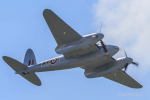 |
KA114 in flight. Image courtesy of Neil Hutchinson. For a larger (1200x800, 62kb) image, click
here. |
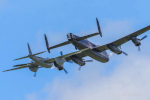 |
KA114 in formation with the Lancaster. Image courtesy of Neil Hutchinson. For a larger (1200x800, 76kb) image, click
here. |
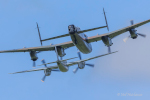 |
KA114 in formation with the Lancaster Image courtesy of Neil Hutchinson. For a larger (1200x800, 286kb) image, click
here. |
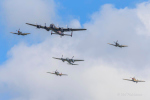 |
KA114, Lancaster, two Spitfires and two Hurricanes. Image courtesy of Neil Hutchinson. For a larger (1200x800, 52kb) image, click
here. |
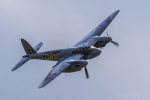 |
KA114 in flight. Image courtesy of Neil Hutchinson. For a larger (1200x800, 62kb) image, click
here. |
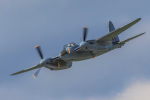 |
KA114 in flight. Image courtesy of Neil Hutchinson. For a larger (1200x800, 49kb) image, click
here. |
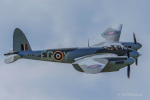 |
KA114 in flight. Image courtesy of Neil Hutchinson. For a larger (1200x800, 61kb) image, click
here. |
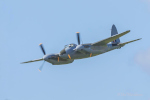 |
KA114 in flight. Image courtesy of Neil Hutchinson. For a larger (1200x800, 52kb) image, click
here. |
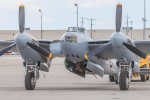 |
KA114 on the ground with cannon and bomb doors open. Note open crew access door. Image courtesy of Neil Hutchinson. For a larger (1200x800, 659kb) image, click
here. |
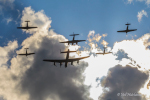 |
Silhouettes of KA114, Lancaster, two Spitfires and two Hurricanes against a bright sky. Image courtesy of Neil Hutchinson. For a larger (1200x800, 416kb) image, click
here. |
| |
September 2012
|
 |
Video of KA114 moving uder its own power. |
 |
Video of KA114 undergoing engine tests of both engines. |
 |
KA114 undergoing test runs of both engines. Image courtesy of Corin McCrae. For a larger (1500x1125,
800kb) image, click here. |
 |
Video of KA114 undergoing initial engine tests of the port engine. |
 |
KA114 about to undergo initial engine test runs of the port engine. Image courtesy of Dave Philips. For a larger (1500x1125,
351kb) image, click here. |
 |
KA114 about to undergo initial engine test runs of the port engine, view from the port side. Image courtesy of Dave Philips. For a larger (1500x1125,
338kb) image, click here. |
 |
KA114 undergoing initial engine test runs of the port engine. Image courtesy of Dave Philips. For a larger (1500x1125,
250kb) image, click here. |
 |
The man who made it all happen, Glyn in front of KA114. Image courtesy of Dave Philips. For a larger (1500x1125,
318kb) image, click here. |
| |
July 2011
|
 |
Video of KA114 undergoing hydraulic testing. |
| |
Janurary 2008
|
 |
KA114's wing attached to the fuselage with canopy structure in place. Image courtesy of Craig Cobolt. For a larger (2048x1536,
1.33Mb) image, click here. |
 |
Full view of the entire starboard wing of KA114 minus the wingtip (removed as Craig arrived). Image courtesy of Craig Cobolt. For a larger (2048x1536,
1.41Mb) image, click here. |
 |
Front spar of the starboard wing showing the point at which the starboard engine will be mounted. Image courtesy of Craig Cobolt. For a larger (2048x1536,
1.45Mb) image, click here. |
 |
The fitted wing of KA114 from below. Image courtesy of Craig Cobolt. For a larger (2048x1536,
1.25Mb) image, click here. |
 |
Overall view of KA114 from the immediately in front of the nose of the aircraft. Image courtesy of Craig Cobolt. For a larger (2048x1536,
1.30Mb) image, click here. |
 |
The port wing inboard area showing the mounting to the fuselage and the area in which the port radiator will be fitted. Image courtesy of Craig Cobolt. For a larger (2048x1536,
1.40Mb) image, click here. |
 |
View along the inside of the leading edge of the starboard wing from the access port shown in the third photo in this series. Note the helpful pencil markings on the internals ribbing! Image courtesy of Craig Cobolt. For a larger (2048x1536,
1.18Mb) image, click here. |
 |
The rear of the starboard wing showing where the nacelle will be attached. Note the flap actuator attachment point bolted to the rear spar of the wing. Image courtesy of Craig Cobolt. For a larger (2048x1536,
1.33Mb) image, click here. |
 |
The end of the starboard wing of KA114 less the wingtip. Image courtesy of Craig Cobolt. For a larger (2048x1536,
1.45Mb) image, click here. |
| |
October 2007
|
 |
The fuselage of KA114 sitting in her jig. Image courtesy of Craig Cobolt. For a larger (2048x1536,
1.45Mb) image, click here. |
 |
Looking forward through the port wing mount into the cockpit. Image courtesy of Craig Cobolt. For a larger (2048x1536,
1.35Mb) image, click here. |
 |
Hydraulic and pneumatic plumbing and equipment on the back of bulkhead no. 2. The Blue structure is part of the Jig to hold KA114 together during restoration. Image courtesy of Craig Cobolt. For a larger (2048x1536,
1.35Mb) image, click here. |
 |
Hydraulic and pneumatic plumbing and equipment on the back of bulkhead no. 2. Image courtesy of Craig Cobolt. For a larger (2048x1536,
1.35Mb) image, click here. |
 |
Electrical box 'B' on the starboard side of the cockpit beside the navigator. Image courtesy of Craig Cobolt. For a larger (2048x1536,
1.30Mb) image, click here. |
 |
Looking forward from the crew hatch along the starboard side of the nose. Note the machine gun tubular brackets near the bottom of the image. Image courtesy of Craig Cobolt. For a larger (2048x1536,
1.38Mb) image, click here. |
 |
Looking rearward from the starboard wing mount. Image courtesy of Craig Cobolt. For a larger (2048x1536,
1.21Mb) image, click here. |
 |
Looking forward from the tail section (not yet installed) through the fuselage. Image courtesy of Craig Cobolt. For a larger (2048x1536,
1.33Mb) image, click here. |
 |
Tailplane, rudder and rear wheel mounting fixtures and fittings on the rearmost bulkhead. Image courtesy of Craig Cobolt. For a larger (2048x1536,
1.23Mb) image, click here. |
 |
Close up of the fabric work on the tail section. Impressive workmanship! Image courtesy of Craig Cobolt. For a larger (2048x1536,
1.25Mb) image, click here. |
 |
Another view of the fabric work. Image courtesy of Craig Cobolt. For a larger (2048x1536,
1.17Mb) image, click here. |
 |
Looking aft at one of the bulkheads. Note the control cable pulleys and the copper bonding. Image courtesy of Craig Cobolt. For a larger (2048x1536,
1.19Mb) image, click here. |
 |
Looking forward at bulkhead no. 4 from the rear hatch. More control cable gear(?). Image courtesy of Craig Cobolt. For a larger (2048x1536,
1.13Mb) image, click here. |
| |
April 2006
|
 |
The main wing jig that will be used in the construction of
the new wing for KA114. Image courtesy of Glyn Powell. For a larger (2160x1440,
346kb) image, click here. |
 |
The front spar bottom boom for the wing for KA114 ready to
be machined, along with machining station. Image courtesy of Glyn Powell.
For a larger (2160x1440, 255kb) image, click here. |
 |
The front spar with blocks for the new wing for KA114. Image
courtesy of Glyn Powell. For a larger (2160x1440, 276kb) image, click here. |
 |
The completed tailplane for KA114 leaving. Image courtesy
of Glyn Powell. For a larger (2160x1440, 238kb) image, click here. |
|
|
March 2006
|
 |
The front spar laminations for the new wing being constructed
for KA114 in the glueing jig. Image courtesy of Glyn Powell. For a larger
(2160x1440, 276kb) image, click here. |
 |
The newly constructed tailplane for KA114, internally painted.
Image courtesy of Glyn Powell. For a larger (2160x1440, 216kb) image, click
here. |
|
| |
KA114 History
KA114, a Mosquito FB.26, was an early production example built at de
Havilland Canada's Downsview factory in Toronto. KA114 was flown straight
into reserve storage with the Eastern Air Command and taken on RCAF charge
on the 22nd February 1945.
Issued to No. 7 OTU at Debert, Nova Scotia on the 25th of February 1945,
KA114 was returned to reserve storage on the 20th of April 1945 and subsequently
to No. 2 Air Command reserve storage on the 23rd of May 1945. KA114 was
next recorded in store with No. 103 Reserve Equipment Maintenace Satellite
(REMS) at Vulcan, Alberta.
KA114 was recorded as still at Vulcan on the 16th of July 1947 and was
finally transferred to War Assets for public disposal on the 3rd of April
1948.
Bought from War Assets by a farmer, KA114 was transported to his farm
near Milo, Alberta, where it stayed for the next 30 years. In August 1978
Ed Zalesky heard about the now derelict Mosquito and negotiated its transfer
to the Canadian Museum of Flight and Transport (CMFT). When Ed and his
crew arrived, they found the aircraft to be in very poor condition and
minus both engines and undercarriage units, but otherwise relatively complete.
In the process of the recovery, the fuselage forward of the wing disintegrated
and the fuselage remains broke in two when being loaded onto Ed's trailer.
The wing, fittings and many other components were however in a much better
state of preservation.
KA114 was stored for a considerable length of time under cover at the
CMFT's storage facility before being bought in 2004(?) by Jerry Yeagan'sFighter
Factory.
KA114 is under active restoration (2005-2006) to fly by Avspecs in New
Zealand.
|
| |
|
)
)
)
)
)
)
)
)
)
)
)
)
)
)
)
)
)
)
)
)
)
)
)
)
)
)
)
)
)
)
)
)
)
)
)
)
)
)
)
)
)
)
)
)
)
)
)
)
)
)
)
)
)
)
)
)
)
)
)
)
)
)
)
)
)
)
)
)
)
)
)
)
)
)
)
)
)
)
)
)
)
)
)
)
)
)
)
)
)
)
)
)
)
)
)
)
)
)
)
)
)
)
)
)
)
)
)
)
)
)
)
)
)
)
)
)
)
)
)
)
)
)
)
)
)
)
)
)
)
)
)
)
)
)
)
)
)
)
)
)
)
)
)
)
)
)
)
)
)
)
)
)
)
)
)
)
)
)
)
)
)
)
)
)
)
)
)
)
)
)
)
)
)
)
)
)
)
)
)
)
)
)
)
)
)
)
)
)
)
)
)
)
)